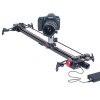
Varavon Sliders - Lessons I learnt


RyanKhoo

Senior Member
Hi there,

I bought this Varavon video some one year ago together with the timeroid and the panning motoroid
http://vimeo.com/63785434

It's only now I have some friends (you know who you are) who helped me figure out how to use it ...

So, I will post here some pointers, hopefully other owners of this slider can benefit too.

Okay, firstly this connection cable is problematic, which ends you connect to on the slider matters, depending on whether the power source is INTernal or EXTernal:

[URL=http://s32.photobucket.com/user/ryan_khoo/media/IMG_9801_zpsokiq4qbm-1.jpg.html][/URL]

If you wanna use the slider just to slide (WITHOUT the timeroid), then use the battery as INTernal. In this case, connect the "L end to the slider (top hole) and the other end to the battery. To move, the black button on the slider has to be switched to "1" (ie INTernal)

But if you wanna use the slider to slide WITH the timerroid so that you can do stop-shoot-move motion for long exposure timelapse, then this time, connect the NON - "L" end to the slider but unlike the earlier case, this time connect the lower hole for EXTernal connection. Then, the "L" end goes to the timerroid (motor 1 - motor 1 is the hole nearer to the edge). To activate, the black button must be switched to "O" (ie EXTernal)

The cable ends of the cable release also matters, The bigger "L" end goes to the camera while the other end goes to the timerroid. If an extension cable is used for the cable release bcos the original cable release is not long enuf to move the entire 1 metre of the slider, then there will be two "L" ends. One bigger "L" and one smaller "L". The bigger "L" goes to the camera remote slot while the smaller "L" goes to the timerroid.

okay, other pics for illustration:

direct connection from slider to battery - INT. The "L" end connects to the slider thru the top hole - for INT connection. To activate, black button switch to "1" (ie internal soucre)
[URL=http://s32.photobucket.com/user/ryan_khoo/media/IMG_9794_zpsaqekttts-1.jpg.html][/URL]
 

Last edited:
other pics:

connection from slider (lower hole is for EXTernal) and the "L" end goes to timeroid - this hole shown in the timerroid is for motor1 (the other empty hole next to it in the timerrroid is for motor2) , to activate black button switch to "0"
[URL=http://s32.photobucket.com/user/ryan_khoo/media/IMG_9793_zpsum3owjyy-1.jpg.html][/URL]


Left Connection shows connection from Timeroid to camera (camera not in this pic). Battery connects to timerroid here as external power source.
[URL=http://s32.photobucket.com/user/ryan_khoo/media/IMG_9795_zpsed79qxah-1.jpg.html][/URL]
 

Last edited:
Lessons on the timeroid.

SWITCH
The slider will move once the timerroid is set to ON (the black switch must be set to "1").

DISTANCE
I am not sure what is the unit of the distance. But 0.01 is the smallest increment. I have tested it roughly you will get 850 shots from one end to the other end (mine is a 1 metre slider) if you set the increment distance to the smallest 0.01

DIRECTION
For L=Left and R=Right direction, if you are facing the slider, and the connection/control end of the slider is on your right, then L is moving to your Left (ie the direction of the end where you can tightened the belt) and R is moving to your right (ie the direction of the connection/control knob)

TIME DELAY
Under the camera menu, there is Ext. Time and Ext. Delay. The units are in ms

Ext. Delay is very confusing and frustating if you don't get it right. After playing with it what i figured out is that this is basically the duration the camera will start to snap a pic BEFORE the slider moves.

Okay easier to ilustrate with example, let say you set the interval time to 8 seconds. The slider will moves every 8 seconds.

You need to know your shutter speed that you set in your camera. Let's say you set your camera's shutter speed to 2 seconds, then the Ext. Delay must be more than 2 seconds.

The Ext. Delay settings MUST BE LONGER than your shutter speed. This is because if the delay duration is faster than the shutter speed, the camera will snap when the slider is moving.

In this example it must be longer than 2 seconds - for this discussion we assume the Noise Reduction in the camera is set to off. So, for this example, we set the Ext. Time Delay to 3000 ms (ie 3 secs)

From the above settings, the camera will snap a pic at the 5th sec, then 2 secs shutter speed, delay 1 sec (total 5+2+1) = 8 secs before it moves again

OTHER SETTINGS

I dunno what is Ext. Time (50), Focus tap (0), Shutter + Focus (On), Repeat (0), Repeat Delay (900). The numbers in brackets are my default settings. I hope someone can explain to me what these setting means.

Hope the above helps ...

Thanks for reading ...

Cheers
 

Last edited:
Page reserved for definition of the following on the Timerroid:

Ext Time (50)
Focus tap (0)
Shutter + Focus (On)
Repeat (0)
Repeat Delay (900).

The numbers in brackets are my default settings.

I hope someone can explain to me what these setting means.

Thank you
 

Lessons on the timeroid.

SWITCH
The slider will move once the timerroid is set to ON (the black switch must be set to "1").

DISTANCE
I am not sure what is the unit of the distance. But 0.01 is the smallest increment. I have tested it roughly you will get 850 shots from one end to the other end (mine is a 1 metre slider) if you set the increment distance to the smallest 0.01

DIRECTION
For L=Left and R=Right direction, if you are facing the slider, and the connection/control end of the slider is on your right, then L is moving to your Left (ie the direction of the end where you can tightened the belt) and R is moving to your right (ie the direction of the connection/control knob)

TIME DELAY
Under the camera menu, there is Ext. Time and Ext. Delay. The units are in ms

Ext. Delay is very confusing and frustating if you don't get it right. After playing with it what i figured out is that this is basically the duration the camera will start to snap a pic BEFORE the slider moves.

Okay easier to ilustrate with example, let say you set the interval time to 8 seconds. The slider will moves every 8 seconds.

You need to know your shutter speed that you set in your camera. Let's say you set your camera's shutter speed to 2 seconds, then the Ext. Delay must be more than 2 seconds.

The Ext. Delay settings MUST BE LONGER than your shutter speed. This is because if the delay duration is faster than the shutter speed, the camera will snap when the slider is moving.

In this example it must be longer than 2 seconds - for this discussion we assume the Noise Reduction in the camera is set to off. So, for this example, we set the Ext. Time Delay to 3000 ms (ie 3 secs)

From the above settings, the camera will snap a pic at the 5th sec, then 2 secs shutter speed, delay 1 sec (total 5+2+1) = 8 secs before it moves again

OTHER SETTINGS

I dunno what is Ext. Time (50), Focus tap (0), Shutter + Focus (On), Repeat (0), Repeat Delay (900). The numbers in brackets are my default settings. I hope someone can explain to me what these setting means.

Hope the above helps ...

Thanks for reading ...

Cheers

thanks for sharing good info

for distance measurement, 1 metre slider move 850 shots based on 0.01, then likely to be 1mm per move? 1m = 100cm = 1000mm and take into account the small gaps on left and right edge

there should be a setting for "delay" before control module triggers the camera shutter = shoot, move, wait (for no vibrations), shoot, move ....
 

Last edited:
Anyone can explain why which end you use to connect in different case matters ?

I am still wondering why this is the case !

Okay, firstly this connection cable is problematic, which ends you connect to on the slider matters, depending on whether the power source is INTernal or EXTernal:

[URL=http://s32.photobucket.com/user/ryan_khoo/media/IMG_9801_zpsokiq4qbm-1.jpg.html][/URL]

If you wanna use the slider just to slide (WITHOUT the timeroid), then use the battery as INTernal. In this case, connect the "L end to the slider (top hole) and the other end to the battery. To move, the black button on the slider has to be switched to "1" (ie INTernal)

But if you wanna use the slider to slide WITH the timerroid so that you can do stop-shoot-move motion for long exposure timelapse, then this time, connect the NON - "L" end to the slider but unlike the earlier case, this time connect the lower hole for EXTernal connection. Then, the "L" end goes to the timerroid (motor 1 - motor 1 is the hole nearer to the edge). To activate, the black button must be switched to "O" (ie EXTernal)

The cable ends of the cable release also matters, The bigger "L" end goes to the camera while the other end goes to the timerroid. If an extension cable is used for the cable release bcos the original cable release is not long enuf to move the entire 1 metre of the slider, then there will be two "L" ends. One bigger "L" and one smaller "L". The bigger "L" goes to the camera remote slot while the smaller "L" goes to the timerroid.
 

i recently borrowed this varavon system from ryankhoo to play for a while to try to figure out this system in greater detail, and to add on to his learning experience in using this system

the slider and pan head systems are actually quite well built and useful (for video work) -- image below shows FS7 being used
$CMxZ5toWgAA1OWS.jpg

the slider system is motorised, and you can control the speed of slide with a knob (really easy to use -- for video work)

the slider system official name is "motorroid" and pan head is "timeroid" --> the names are confusing (and wait till you try to figure out what goes where), so i shall just refer to them as slider and pan head

MOTORROID = slider system
$n_500_n__99014.1405467965.1280.1280_4152610b-6245-4cf8-8a5a-964abfd20858_1024x1024.jpg

TIMEROID = panning head system
$varavon_timeroid_full_12__96819.jpg

both motorroid and timeroid can be controlled by a controller called "timeroid controller" << again, confusing name

timeroid controller has 2 control ports = 2-axis motion

difficulty in using this system
-- lack of user manual for the controller
-- the ports weren't labelled
-- the wires weren't labelled
-- the menu system in the controller was worse than those from old nokia phones

but with a bit of trial and error and diy labelling, the full system can function as a 2-axis motion control timelapse system

power can be direct from wall plug or from 12v battery packs (which are cheap and easy to get)
a link to battery pack (and how to charge the battery) -- http://www.aliexpress.com/item/12v-...argeable-mobile-power-DC-1248A/789821349.html

in truth, i wasn't interested in this system's ability to do motion timelapse (coz there are much better systems already) but rather how the panning head can be hacked for other uses

the pan head (timeroid body) can also be used for slider movements (using guide rope - pull system), pretty much in the same manner as a syrp genie, so i was curious about the potential of the varavon systems (example below)
$Syrp-Genie-Cable-Cam-1.jpg

will update soon after doing more tests with more photos and information =)
 

Last edited:
Wow! The last suspended picture is interesting. Wonder if it is worth the trouble? Haha
 

Wow! The last suspended picture is interesting. Wonder if it is worth the trouble? Haha
We shall wait for the continuation of the review from PettyPoh ... :bsmilie: :)
 

i recently borrowed this varavon system from RyanKhoo to play for a while to try to figure out this system in greater detail, and to add on to his learning experience in using this system
Thanks pettypoh for the review ... I am certainly glad to have lend you to play with the system ... :)

Btw, the pic of the slider on a Sony FS7 is from a random pic or did you just recently purchase a FS7 ?

I am really very glad to be able to finally know that both the slider and pan head can be combined and simultaneously controlled by the timerroid to perform a 2-axis motion ... thanks buddy !

Thanks again ...
 

Last edited:
Wow! The last suspended picture is interesting. Wonder if it is worth the trouble? Haha

Until drones are good enough for long timelapse shoot, this may be the most feasible way to do aerial timelapse but logistics and planning headache for sure

Thanks pettypoh for the review ... I am certainly glad to have lend you to play with the system ... :)

Btw, the pic of the slider on a Sony FS7 is from a random pic or did you just recently purchase a FS7 ?

I am really very glad to be able to finally know that both the slider and pan head can be combined and simultaneously controlled by the timerroid to perform a 2-axis motion ... thanks buddy !

Thanks again ...

Thanks, fs7 image is from varavon twitter acct -- somebody else tested and said the silder can carry the weight. I have tested before 5dm3 on the varavon slider doing vertical movement as well and worked properly
 

continue review and user guide =)

slider unit in a nice carrying case
$2015-09-05 10.10.23 (Medium).jpg

controls for the slider unit
> the I/O black switch is actually not a ON/OFF switch -- it's a "INTERNAL/EXTERNAL" switch ... again, confusing system
> if using INTERNAL (direct power/battery supply) > must switch to "I"
> if using EXTERNAL (timeroid controller) > must use "O"
> the red button "II/O/I" is for direction of slide >> only when using INTERNAL (direct power/battery supply)
> the red knob is to control speed >> only when using INTERNAL (direct power/battery supply)
$2015-09-05 10.49.38 (Medium).jpg

the full unit (slider and panning head), just for a gauge of the size < considered "compact" already
> for the unit to operate, suggestion is to prepare 2 tripods and 2 separate ball heads for the entire unit
$2015-09-05 10.34.23 (Medium).jpg

panning head + controller + blue colour battery pack
> 1 key advantage of this system is only need 1x12V battery pack to power all items (controller + slider + panning head)
$2015-09-05 10.49.22 (Medium).jpg
 

panning head (bottom) with 1/4inch hole and 3/8inch hole
> the red disc is removable
>> with red disc => panning head
>> without red disc => non-panning head ==> can be used for cable-lapse
$2015-09-02 16.41.27 (Medium).jpg

panning head (side) -- port for wire from controller (there is no direct power port for panning head)
$2015-09-02 16.41.45 (Medium).jpg

timeroid controller front (screen and buttons)
$2015-09-02 16.42.12 (Medium).jpg

timeroid controller (left side) > camera cable port and power supply port
$2015-09-02 16.42.35 (Medium).jpg

timeroid controller (right side) > 2 motor ports
$2015-09-02 16.42.50 (Medium).jpg
 

video test 1 about 250frames - night panning using panning head only at ion orchard
[video=youtube_share;1Wy1SAJxyoA]https://youtu.be/1Wy1SAJxyoA[/video]
 

video test 2 about 230frames - day slide and pan at bishan park
[video=youtube_share;MKkS-_RqDSs]https://youtu.be/MKkS-_RqDSs[/video]
 

video test 3 about 90frames - day slide (30deg decline) and pan at bishan park
[video=youtube_share;UT82x9pVCA0]https://youtu.be/UT82x9pVCA0[/video]
 

Last edited:
video test 4 about 240frames - day slide only bishan park
[video=youtube_share;YfWOx0UtOuU]https://youtu.be/YfWOx0UtOuU[/video]
 

Thanks bro pettypoh for the excellent review ...
 

Back
Top