About Tianya Filter


I'm not very sure too, it's from my experience (not very long though :embrass:) and some logical deductions.

Tried using a B+W 106 ND (6 stops) plus 2-stop GND and very often I'll still get vignetting, especially when the sun is near the horizon where the difference in the brightness compared to other parts of the sky further away from the sun is very huge. (unless, somebody invent a GND that gets lighter in circular direction like ripples in water). Add the fact that curvier the front element meant that the part further away from the sun will get lesser light, so it becomes darker :sweat:

The vignette is probably due to parts of the outer rim of your filter(or filter holder) showing up at the corners of the frame. It looks like a dark blur because it is only at the edge, and it is not in focus.
 

CPL with UV can cause problems. in some situations. I have more than a few shots ruined because of this, but this was quite some years ago.

erm like?:think:

got photos? i think easier to understand
 

The vignette is probably due to parts of the outer rim of your filter(or filter holder) showing up at the corners of the frame. It looks like a dark blur because it is only at the edge, and it is not in focus.

If it's parts of the outer rim of filter or filter holder, then it will appear black but mine isn't. I can still see the corners but just 2 to 3 stops darker. :dunno:

And also, the rim of my sigma 10-20mm is 2-3 cm away from the edge of the front element plus I've removed the part for 3rd GND filter.
 

Last edited:
I think vignetting has also got something to do with the strength of light at the corner of the frame which usually is further away from the sun plus the curvature of the len's front element. It can get really pronounced if the sun has not set / has already risen.

I think the difference in distance from the sun is something we can neglect here. I found a very informative article here: http://toothwalker.org/optics/vignetting.html
 

If it's parts of the outer rim of filter or filter holder, then it will appear black but mine isn't. I can still see the corners but just 2 to 3 stops darker. :dunno:

And also, the rim of my sigma 10-20mm is 2-3 cm away from the edge of the front element plus I've removed the part for 3rd GND filter.

vignette caused by outer rims is not necessarily solid black and well defined. It can be this blurry darkness if the aperture is not stopped down and if the it is just at the edge of the frame.
 

Last edited:
If it's parts of the outer rim of filter or filter holder, then it will appear black but mine isn't. I can still see the corners but just 2 to 3 stops darker.
The further away from the sensor the less sharp appears anything that is in the way of the light. That's the reason why you cannot see vignetting as sharp rim (unless it's really physical vignetting e.g. by wrong lens hood or filter holder). Similar, dust on front element is irrelevant. There was even a "review" of a lens being 'slightly unsharp' and with 'some CA' ... turns out the front elements is cracked.
 

I think the difference in distance from the sun is something we can neglect here. I found a very informative article here: http://toothwalker.org/optics/vignetting.html

Thanks for the very detailed link :thumbsup:

vignette caused by outer rims is not necessarily solid black and well defined. It can be this blurry darkness if the aperture is not stopped down and if the it is just at the edge of the frame.

hmm....I'll try to dig into my files and post here after my dinner. :)
 

I think the difference in distance from the sun is something we can neglect here. I found a very informative article here: http://toothwalker.org/optics/vignetting.html

Read the article, very technical but very educational. :thumbsup:

Here's something from the article that I think might be similar to what I was referring to:

1) Huge difference in brightness across the frame

"The last effect relates to Lambert's law and can be compared with a late afternoon sun which heats the earth less than the sun at noon because the same beam of sunlight is spread over a larger area. The combined effect of all cosine factors is a cos4 illumination falloff towards the image corners. "


2) a GND that becomes brighter like ripples in water

"Lenses which strongly suffer from natural vignetting benefit from a gradual gray filter which is dark in the center and brighter towards the corner. "

3) No mention was made on the curvature of the front element so this point non-applicable.

vignette caused by outer rims is not necessarily solid black and well defined. It can be this blurry darkness if the aperture is not stopped down and if the it is just at the edge of the frame.

Here's an example of a photo I took last Dec:

1.
4793145025_bbd5f7885b_z.jpg

ISO 100, f13, 1/20s

As you can see, vignetting is stronger on the top right which further away from the sun compared to the top left.
 

Last edited:
so what color did u get? Is it more pleasing/easier to neutralise?

the color cast is not pleasant at all... i never correct color cast before...though i read a book that tells me how to do it... will try it someday....

for that shot i convert it to bnw.. i did post it in cs before... it is a outing org by dingaroo...
 

Here's an example of a photo I took last Dec:

1.
4793145025_bbd5f7885b_z.jpg

ISO 100, f13, 1/20s

As you can see, vignetting is stronger on the top right which further away from the sun compared to the top left.

Somehow, I don't find this example to be vignette. that part of the sky is just darker than the parts near the sun.
 

Somehow, I don't find this example to be vignette. that part of the sky is just darker than the parts near the sun.

My definition of vignette is flawed, I guess. :embrass:
Anyway, the photo didn't turn out the way I wanted it to and it's not quite to my liking. :think:
 

My definition of vignette is flawed, I guess. :embrass:
Anyway, the photo didn't turn out the way I wanted it to and it's not quite to my liking. :think:

You can try to shoot when the sun is higher up in the sky. That way the sky will light up better.

Or you can use PP to recover the dark areas as well.
 

You can try to shoot when the sun is higher up in the sky. That way the sky will light up better.

Or you can use PP to recover the dark areas as well.

when the sun is higher up, then it won't be a sunrise photo. :bsmilie:

I don't know how to PP it bcoz it gets darker towards the corners. :sweat:
 

when the sun is higher up, then it won't be a sunrise photo. :bsmilie:

I don't know how to PP it bcoz it gets darker towards the corners. :sweat:

You can get around it by using a reverse GND, or using PP to do the same reverse GND effect.

Just do a graduated reduction in exposure from horizon to top of frame. Then do a graduated boost in exposure from middle of the sky to top of the frame. Adjust the levels and start lines till it looks natural. Should be quite fast to do.

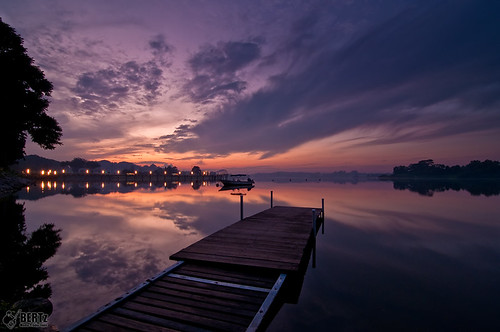
Either that, you can shoot when the sun is below the horizon so the differences in exposure is not that great. This is one example I shot:

4779373185_576f679c33.jpg
 

Last edited:
You can get around it by using a reverse GND, or using PP to do the same reverse GND effect.

Just do a graduated reduction in exposure from horizon to top of frame. Then do a graduated boost in exposure from middle of the sky to top of the frame. Adjust the levels and start lines till it looks natural. Should be quite fast to do.

Either that, you can shoot when the sun is below the horizon so the differences in exposure is not that great. This is one example I shot:

4779373185_576f679c33.jpg

is that the one with uv+cpl?:think:
 

is that the one with uv+cpl?:think:

No no no. This one is shot naked and bare. Just trying to show slth123, how it looks like to shoot sunrise with the sun just below the horizon.
 

is that the one with uv+cpl?:think:

Ok this is the one...

I cannot find the original. Must have been gone when my HDD crashed one time. Did not backup everything. This is one of the best among the batch with UV + CPL. And this is after I did my best to fix it already. But you can still can see remnants of the problem.

3384474983_8d86677f38_o.jpg


Can you see it? The edges are all fuzzy, and give a generally soft look.

The following is shot with the same camera with the UV but without the CPL on the same day in the same lighting conditions.

3385289728_e40fcece91_o.jpg


Excuse the poor photography skills... This was quite some time ago.
 

Last edited:
Ok this is the one...

I cannot find the original. Must have been gone when my HDD crashed one time. Did not backup everything. This is one of the best among the batch with UV + CPL. And this is after I did my best to fix it already. But you can still can see remnants of the problem.

3384474983_8d86677f38_o.jpg


Can you see it? The edges are all fuzzy, and give a generally soft look.

The following is shot with the same camera with the UV but without the CPL on the same day in the same lighting conditions.

3385289728_e40fcece91_o.jpg


Excuse the poor photography skills... This was quite some time ago.

ok i'll try it out:think: maybe i'll remove the uv and see what happens:thumbsup:
thanks!
 

Back
Top