My Try @ Product Photography - Toys and Collectables


For TABLE OF CONTENTS of all images in this thread please see Page 20


What's featured on this Page 9....


14958145649_368680e730_o.jpg

15121831666_a4698a8f18_o.jpg


NOTICE: If you don't see the images in some of the older posts means I had used up the 10GB bandwidth for this month. I'm sorry these pictures can no longer be viewed until next month where the counter will be reset to zero and the pictures would then appear again. For the newer posts I am using another account so it is not affected. Enjoy !


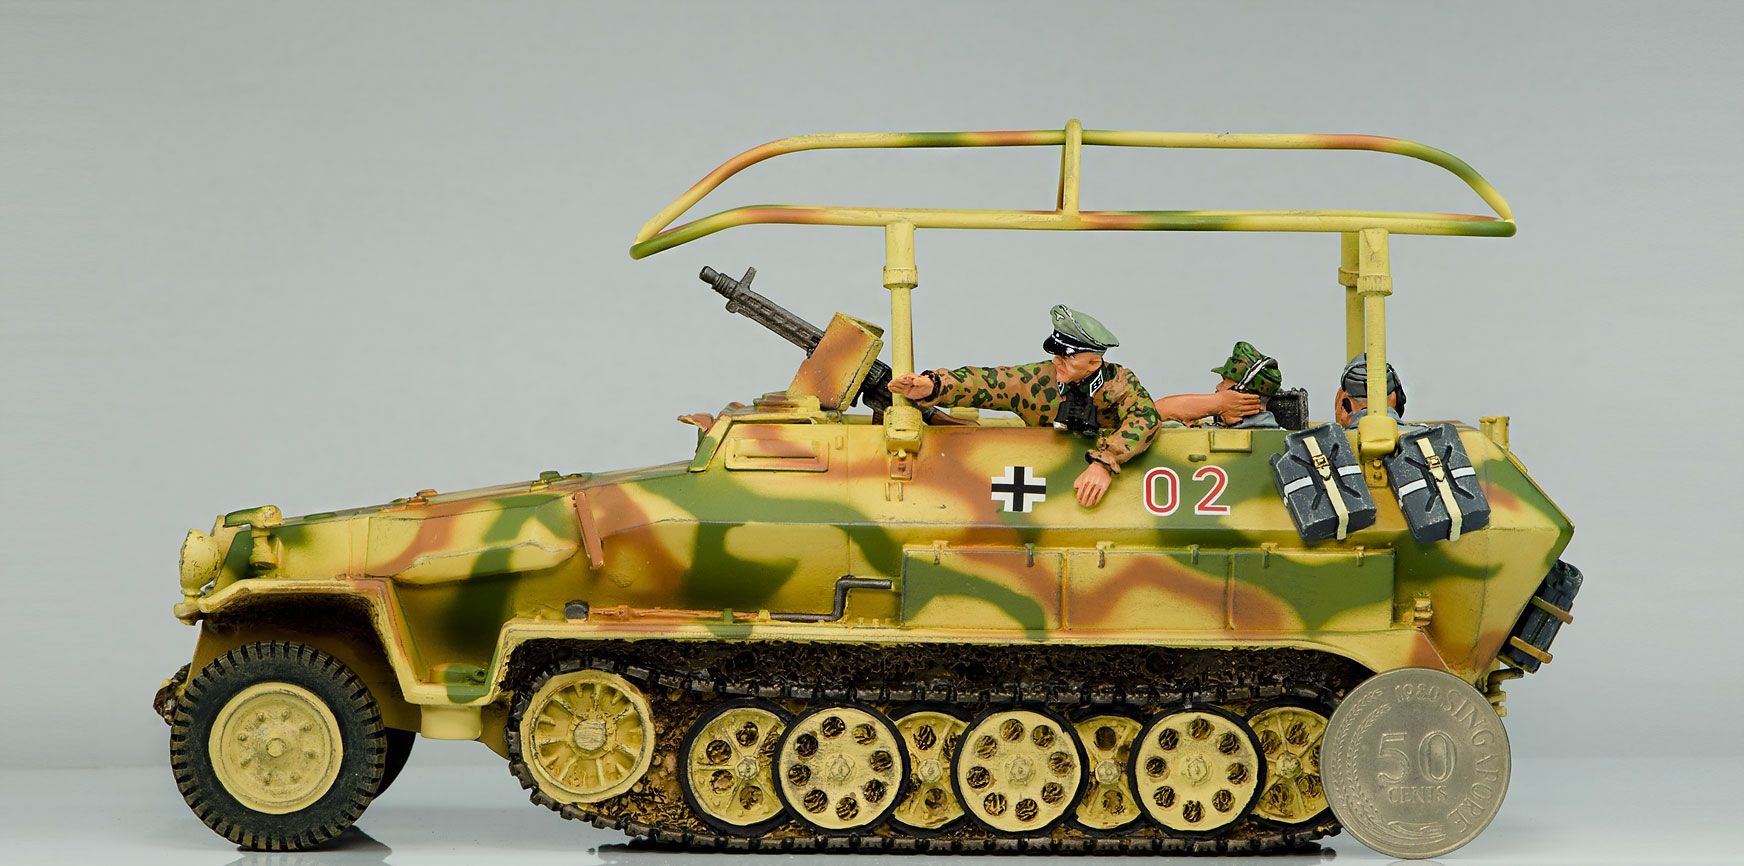
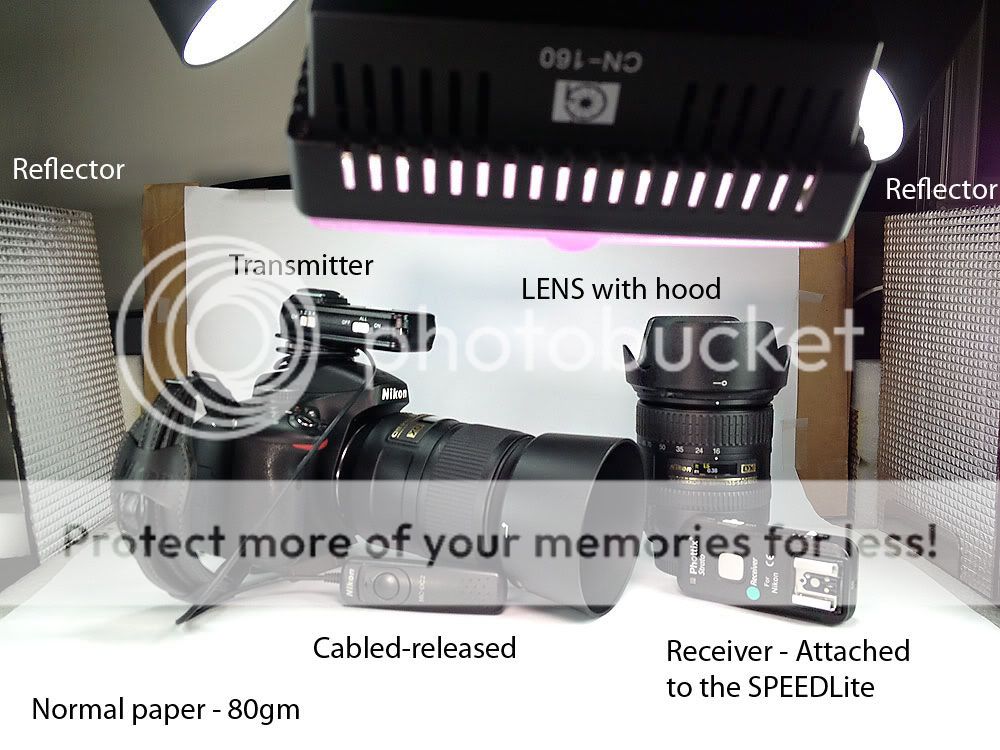
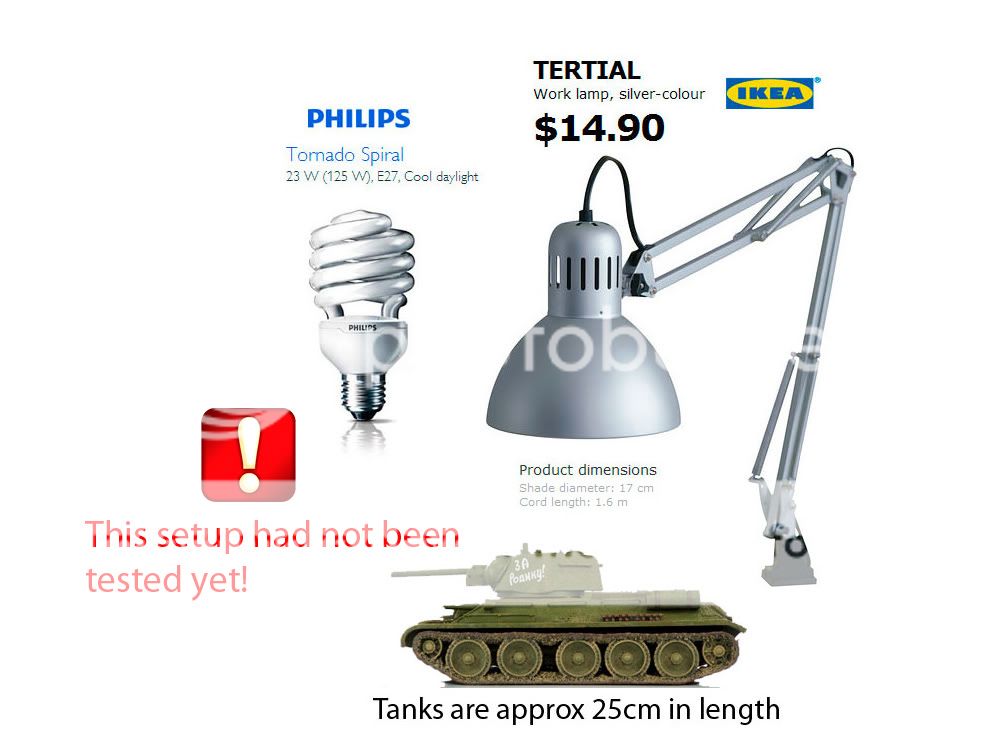
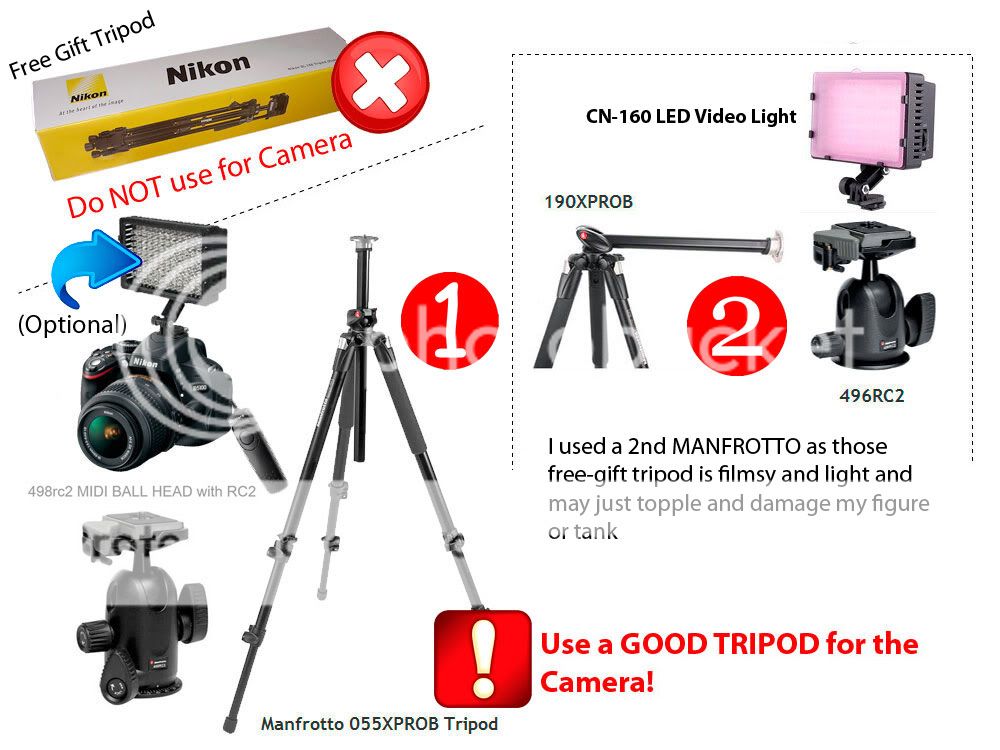
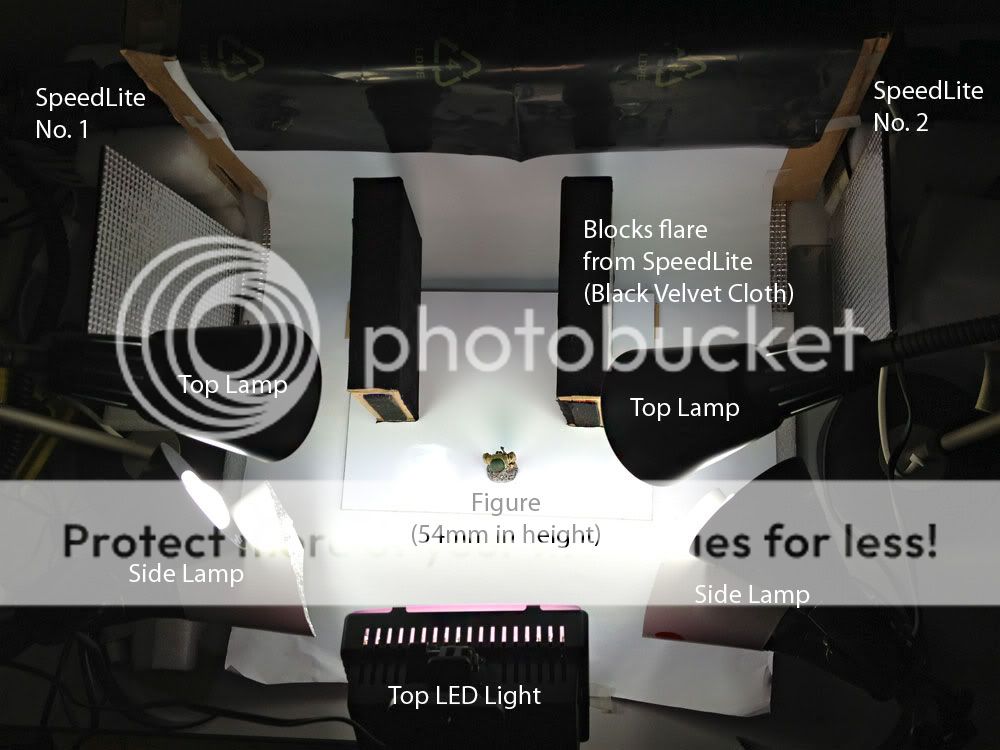
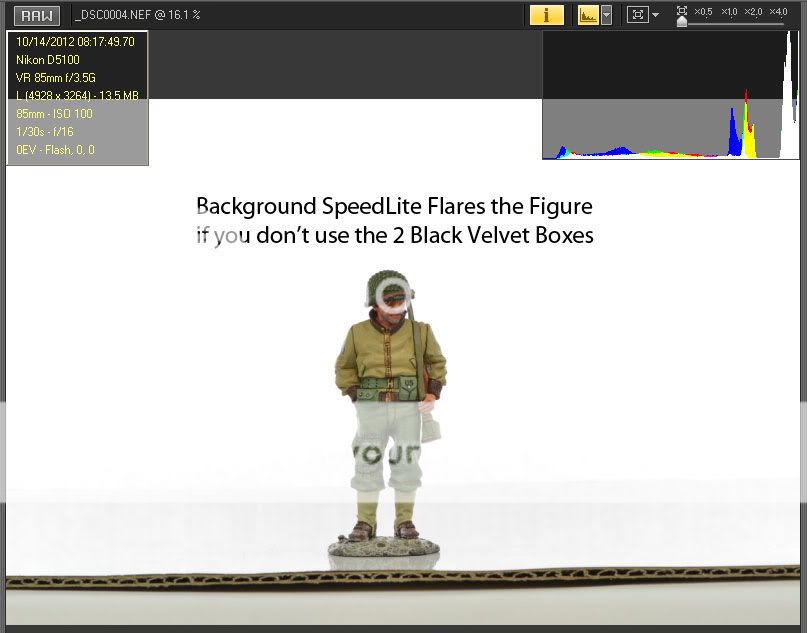
Shooting Small Toys Tips - Behind the Scenes

Setup1.jpg


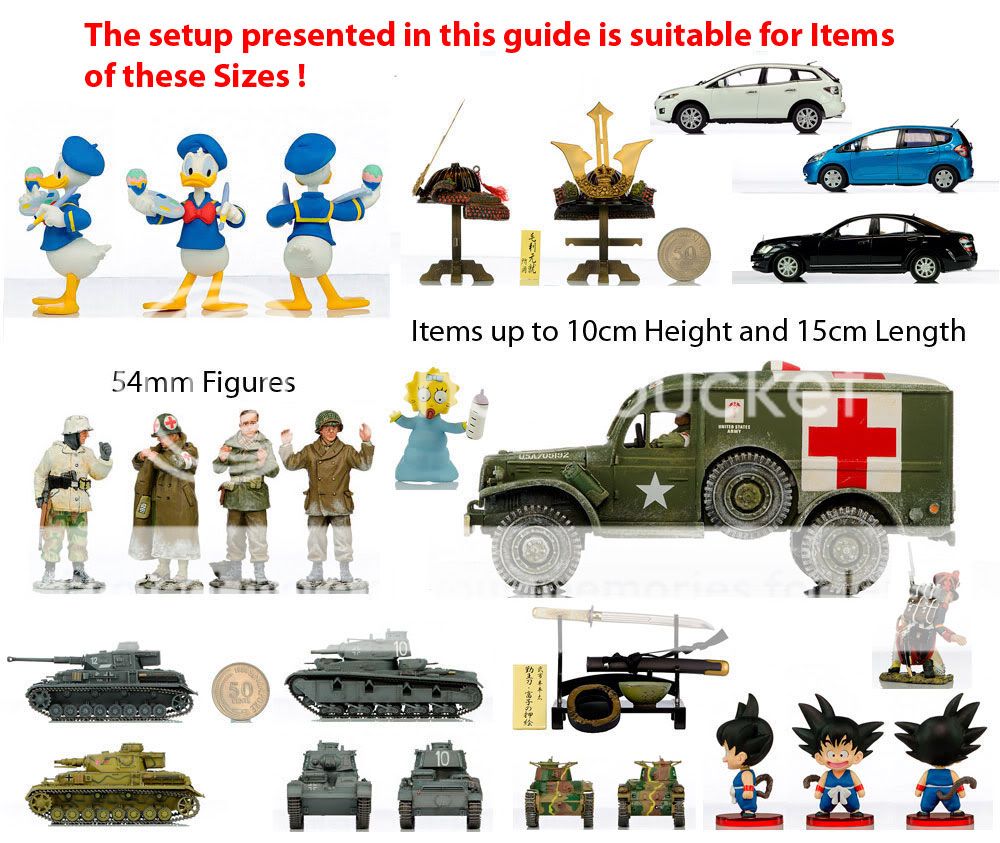
Here is how I did it...

BTW I am no expert in this field - the tips provided here are for home enthusiast who like to produce the shoots/images pictured in this thread


CameraAnimated60.gif
For TIPS on how these images are shot please see this thread
 

Last edited:
Part 2 - The Camera and Accessories

I use the NIKON D5100 for now. For Hi-Key shots I used the PHOTTIX wireless trigger to fire the Speedlite (these don't need line of sight).

Setup6.jpg


Also used the NIKON cabled trigger for a more sharper shot. The NIKON infra-red tigger also works as well if you have one (but it drains the battery of the camera much faster)

Settings used are:
1. Lens VR turn off and use MANUAL focusing
2. Use a cable release and lock the mirror (in NIKON this is call exposure delay which will minimise vibration of the camera to give you the sharpest image)
3. Aperature I use f16 and shutter speed 1/30 (you can try yourself which one gives you best exposure)
4. White Balance set to FLASH
5. Shoot in RAW format
 

Part 3 - The Lightings and Support

I used low-cost IKEA lamps. These are sufficient for Figures but for armored tanks (30cm in length) is not enough. ALL lamps used are COOL DAYLIGHT from PHILIPS - stick to ONE brand only for consistency in the lights color temperature

Setup9.jpg


Just bought this lamp (17cm shade) and experimenting for the tanks shooting - yet been tested though

Setup10.jpg


UPDATE 25 OCT - above setup works ! See picture below (click to see large image)

Also used 2 LEDs lamps CN-160. These can be bought over ebay and are not expensive compared if buying in SINGAPORE camera shops!


VERY VERY IMPORTANT - use a good tripod for the camera. The free tripod usually bundled with the camera are LOUSY - you can actually see the differences - if your image is not sharp all things doesn't matter any more

Setup11.jpg
 

Last edited:
Part 4 - Behind the Scenes

This is how the lightings are setup from the top view.

Setup12.jpg


Just move the lamps nearer/further from the figures to get the lightings you require.

setup13.jpg


To prevent flare from the flash in Hi-Key shots, I also used two small boxes to block it (DIY using velvet black coth glued to it) See the differences....

setup14.jpg


Noticed the unprocessed image is already "95% there" - just some sharpening and you will have your final image.

setup15.jpg


Experiment and Enjoy !

UPDATE 31 OCT - I had started a new thread of the tips here where I will add more topics from time to time My Tips @n Toy and Collectables Photography
 

Last edited:
no prob bro.. eagerly awaiting ur setup.. haha.. i also DIY one.. but my pics still cannot achieve 立体 effect.. till now i still contemplating whether to go n buy those setup from shops.. haha..

Hope you would find the above guide useful... ;)
 

A WW2 American Ambulance...

BBA037-01 Dodge WC54 U.S. Army Ambulance (Winter Version) (King and Country BBA037-01)


Last edited:


These vechicles are historically accurate....... ;)


BBA028 Takin' It Easy (King and Country BBA028)

kingncountry114a.jpg


kingncountry112a.jpg

kingncountry112.jpg
 

Last edited:
kingncountry113a.jpg

kingncountry113-1.jpg

kingncountry113-2.jpg


Tips on Focus Stacking - how this shot was taken here
 

Last edited:
Hey... where did you get that coca-cola ?

Another shot in high-key
kingncountry114.jpg


BBA029 GI Drinking Coffee (King and Country BBA029)

kingncountry111a.jpg


kingncountry111.jpg
 

Last edited:
HA9008 Hobby Master - Junkers JU-52 "Immelmann II", late 1930s

This metal plane is about 14cm long - is heavy and so historically accurate !

D2600.jpg
hobbymaster-ju52-nazi-fly.jpg
 

Last edited:
This is a command car - relaying information on the battelfield to the commander. The top railings are in fact comms antenna.

In WW2 the Germans had already know how to use camouflage for the vechicles and tanks.... so this concept is not something new today.


Click on the image to see the large size photo


Last edited:


Click on the image to see the large size photo


BTW the 4 soldiers are glued to the vechicle (1 driver inside the canopy - not seen from here) that is why I cannot remove them to shoot the vechicle only
 

Last edited:
Late WW2 the German already are using camouflage uniforms - more than 60++ years ago - nothing changed much, we still using camouflage uniforms till today...

kingncountry116a.jpg

kingncountry116.jpg
 

Commanders making real-time battle decisions....


WS077(SL) Panzer Meyer's Command Halftrack (King and Country WS077(SL))


Click to see the large size image
 

Last edited:


All together 6 figures (Driver hidden from view) - the WW2 Vechicle Command Set. The Germans already know the importance of communications in battlefield since WW2, this 3G or 4G army concept is not something new anyway - was already used 60+ years ago :bsmilie:
 

Last edited:
Boy are they historically accurate.... :thumbsup:

(Click to see the large size image)


Back
Top