Let’s wrap up my post from last week on using face recognition in Lightroom. If you should ever find a photo of a person within a face group who is not the right person for that face group (or if it is a photo you don’t want assigned that person’s name), you can right-click the photo and choose Remove photo from Person in the contextual menu that appears.
If you have a lot of face groups that you want to hide at once, click the three-dot menu in the upper-right while in People View, and choose Show and Hide People. That same three-dot menu also contains options for sorting the face groups by first name, last name, or count (how many photos within that group from highest to lowest).

Here you can uncheck the box next to any face group you want to hide or check the box next to any face group you want to show. When finished, click Done to exit that mode.

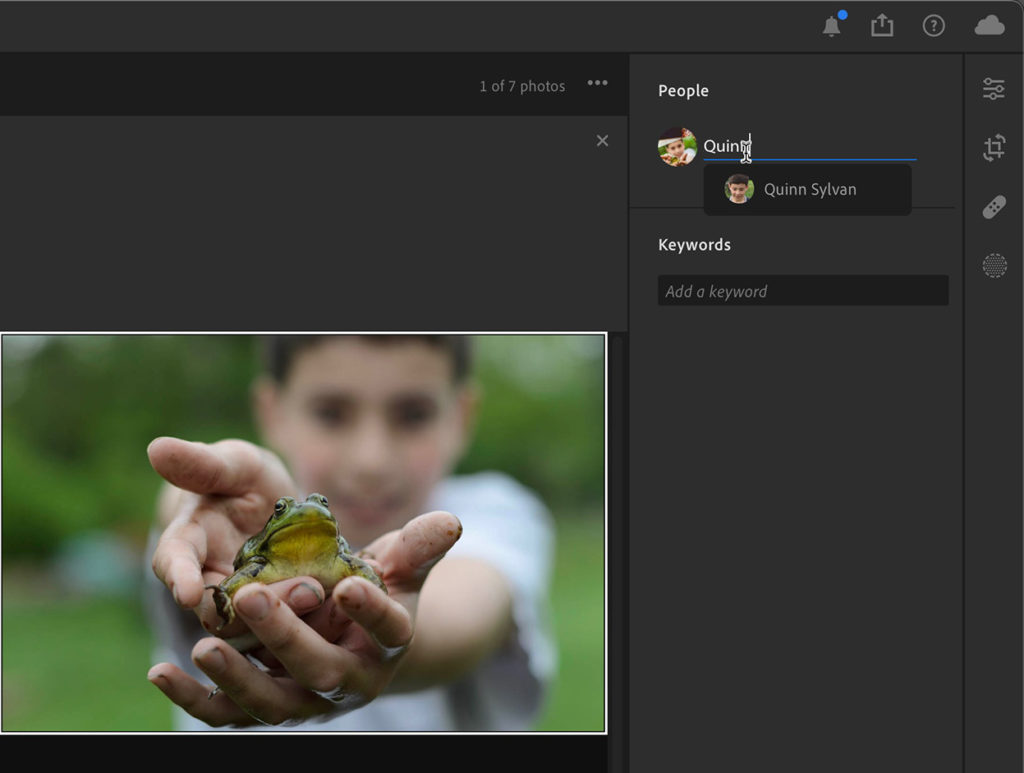
You can manually assign a people tag to a person by selecting that photo, then clicking the Keyword icon in the lower-right to open the Keyword panel on the right. In the Keyword panel, expand the People section if not expanded, then click where it says Add Name and enter the desired name. You can also delete names to remove the People tag from a given photo in this view.
You can also merge unnamed face groups a couple of ways. The easiest is to simply drag one face group on to another face group of the same person, and then when prompted choose Merge. You can also drag an unnamed group onto a named group to merge them in the same way.
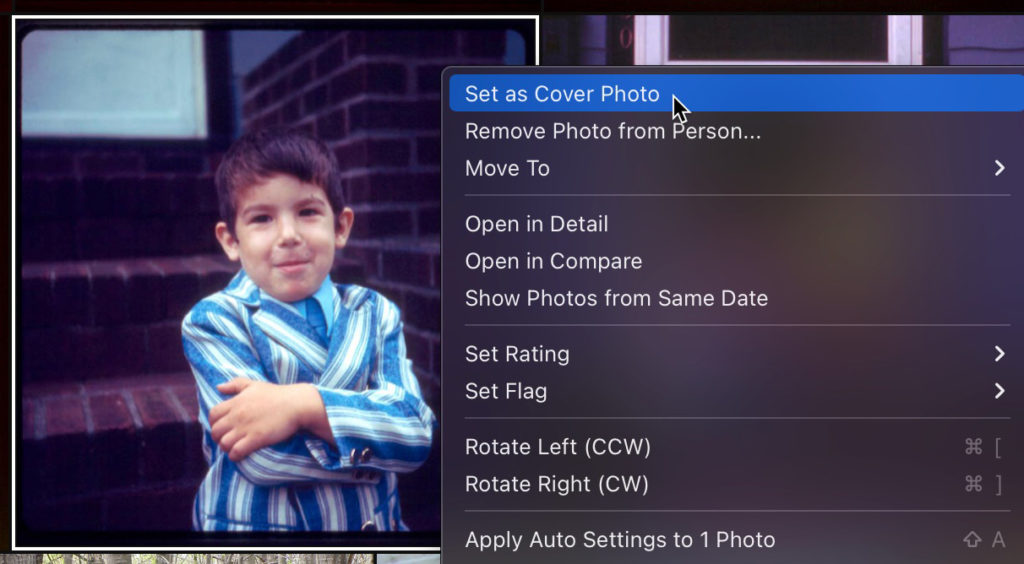
Finally, you can also designate a photo of your choosing to be the cover photo for a particular person’s face group. Click into that face group to see all of the photos it contains, then right-click the photo and choose Set as Cover Photo from the contextual menu. There is also a three-dot menu that appears in the upper-right of People View that contains that same menu option.
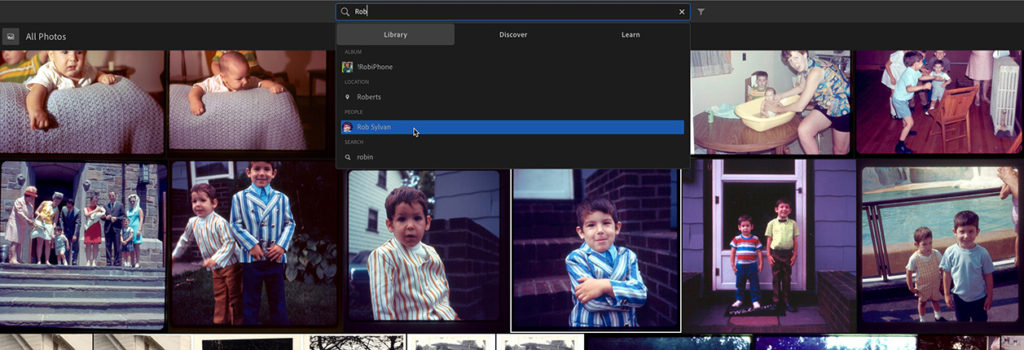
The goal of all of this is to help you find photos of those people over time. Exit People View by clicking All Photographs, then enter a person’s name in the search field. One of the data points that will appear is any people tag that matches what you’ve entered. You can use People Tags alone to find all photos of that person or combine those tags with other keywords for more specific searches. The real power of entering any kind of metadata is how it can help you find, organize, and access your photos over your lifetime.
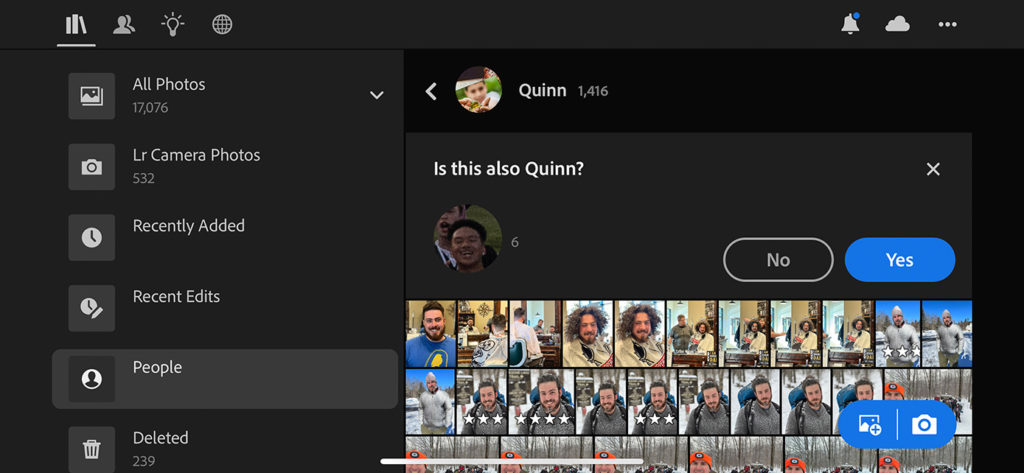
People View on Mobile
I find it much easier to do all of what I described above in the desktop version of Lightroom, but you can do all of this on mobile too. I just find the larger desktop screen and interface easier to use for a big job like this. The benefit though is that no matter where you assign the names or set cover photo or hide faces it all syncs across the Lightroom ecosystem (but not Lightroom Classic). So start with Lightroom on your Mac or Windows computer if you prefer and know you can leverage that work to find your people on all of your other devices that run Lightroom.
The post Finding People in Lightroom (cloud) Part 2 appeared first on Lightroom Killer Tips.
Continue reading...
If you have a lot of face groups that you want to hide at once, click the three-dot menu in the upper-right while in People View, and choose Show and Hide People. That same three-dot menu also contains options for sorting the face groups by first name, last name, or count (how many photos within that group from highest to lowest).

Here you can uncheck the box next to any face group you want to hide or check the box next to any face group you want to show. When finished, click Done to exit that mode.

You can manually assign a people tag to a person by selecting that photo, then clicking the Keyword icon in the lower-right to open the Keyword panel on the right. In the Keyword panel, expand the People section if not expanded, then click where it says Add Name and enter the desired name. You can also delete names to remove the People tag from a given photo in this view.

You can also merge unnamed face groups a couple of ways. The easiest is to simply drag one face group on to another face group of the same person, and then when prompted choose Merge. You can also drag an unnamed group onto a named group to merge them in the same way.

Finally, you can also designate a photo of your choosing to be the cover photo for a particular person’s face group. Click into that face group to see all of the photos it contains, then right-click the photo and choose Set as Cover Photo from the contextual menu. There is also a three-dot menu that appears in the upper-right of People View that contains that same menu option.
The goal of all of this is to help you find photos of those people over time. Exit People View by clicking All Photographs, then enter a person’s name in the search field. One of the data points that will appear is any people tag that matches what you’ve entered. You can use People Tags alone to find all photos of that person or combine those tags with other keywords for more specific searches. The real power of entering any kind of metadata is how it can help you find, organize, and access your photos over your lifetime.

People View on Mobile
I find it much easier to do all of what I described above in the desktop version of Lightroom, but you can do all of this on mobile too. I just find the larger desktop screen and interface easier to use for a big job like this. The benefit though is that no matter where you assign the names or set cover photo or hide faces it all syncs across the Lightroom ecosystem (but not Lightroom Classic). So start with Lightroom on your Mac or Windows computer if you prefer and know you can leverage that work to find your people on all of your other devices that run Lightroom.

The post Finding People in Lightroom (cloud) Part 2 appeared first on Lightroom Killer Tips.
Continue reading...


