RSSNewsFeeder
Member
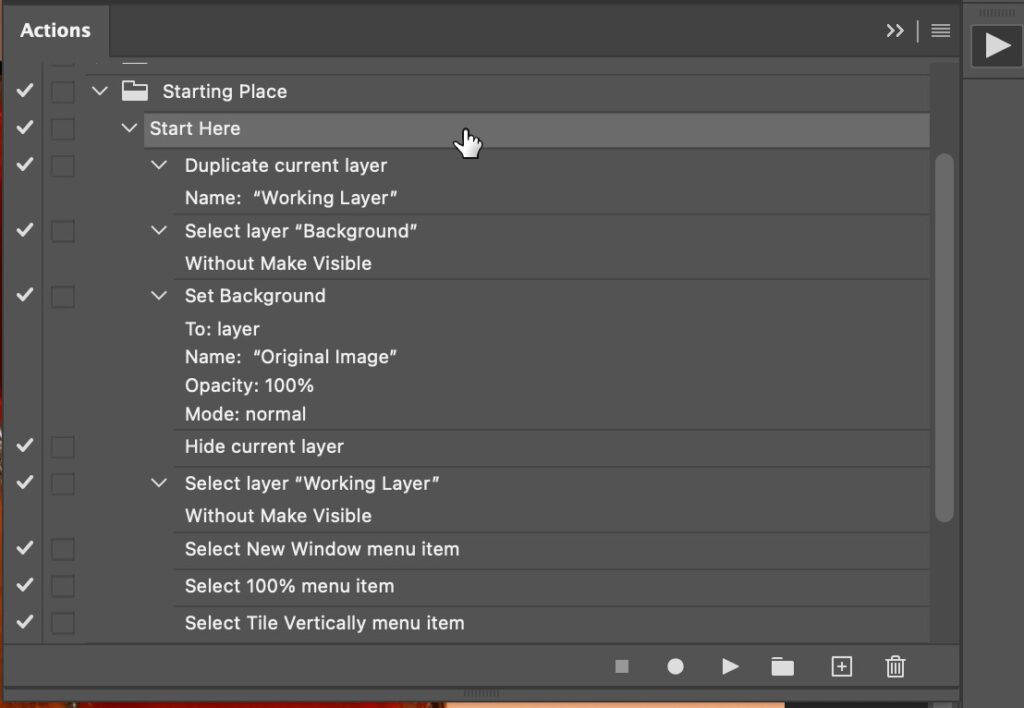
First, let’s create a droplet. You’ll first need an action that you would want to run as part of your export process. For example, while it is easy enough to send a copy to Photoshop for editing from LrC just by pressing CMD/Ctrl+E, if you use the export dialog and run the photo through the droplet you can do even more. I have an action that I use when retouching that does the following:
This way I can start retouching the duplicated layer at 100% while simultaneously seeing how it affects the photo when zoomed out. Nothing life changing, just a few simple steps that can be done with the click of an action. This can be used the more traditional route of using the Edit in Photoshop command from LrC to send a copy to Photoshop. Once the photo opens in Ps, I’d simply run the action (press the Play button in the Action panel) and then start editing. To take it to the next level I’d create a droplet from that action. Here’s how:
Step One: In Photoshop, go to File > Automate > Create Droplet to open the Create Droplet dialog box.
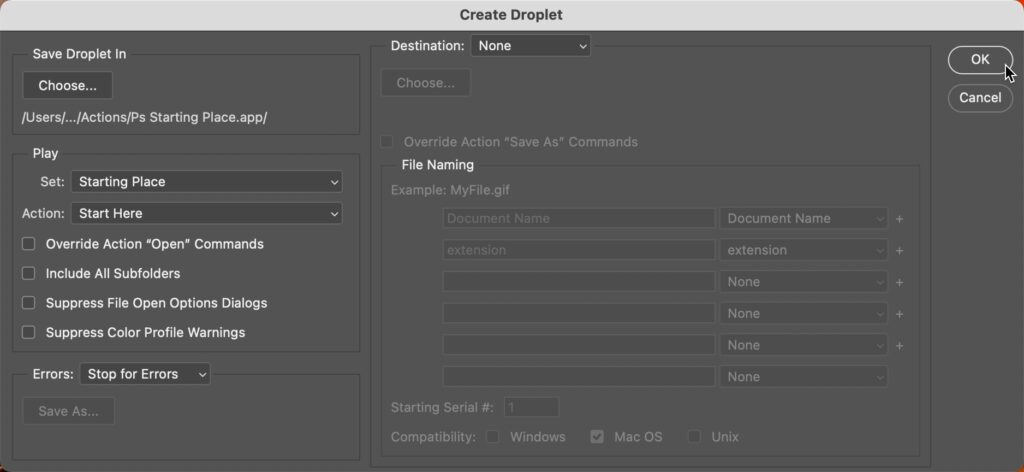
Step Two: Click Choose to configure where you want your droplet to be saved (I have a designated folder in Dropbox for all actions and droplets) and give the droplet a name.
Step Three: In the Play section, choose the Action set containing your action, then in the Action section, select the action you want to be made into a droplet.
Step Four: Configure other options as needed based on what your action does (or doesn’t do). For this action, I don’t need to configure any other options, so I just clicked OK to create the droplet in the designated location.
Now that you have your droplet, you need to put it in a special folder in order for it to appear on the Export dialog in LrC. Here’s how:
Step One: Select any photo in LrC and click the Export button to open the Export dialog (we’re not going to export a copy of this photo, so anyone will do).
Step Two: On the Export dialog, in the Post-Processing panel, click the After Export drop-down menu and choose Go to Export Actions Folder Now to open this special folder in your system’s file browser (Finder/Explorer).
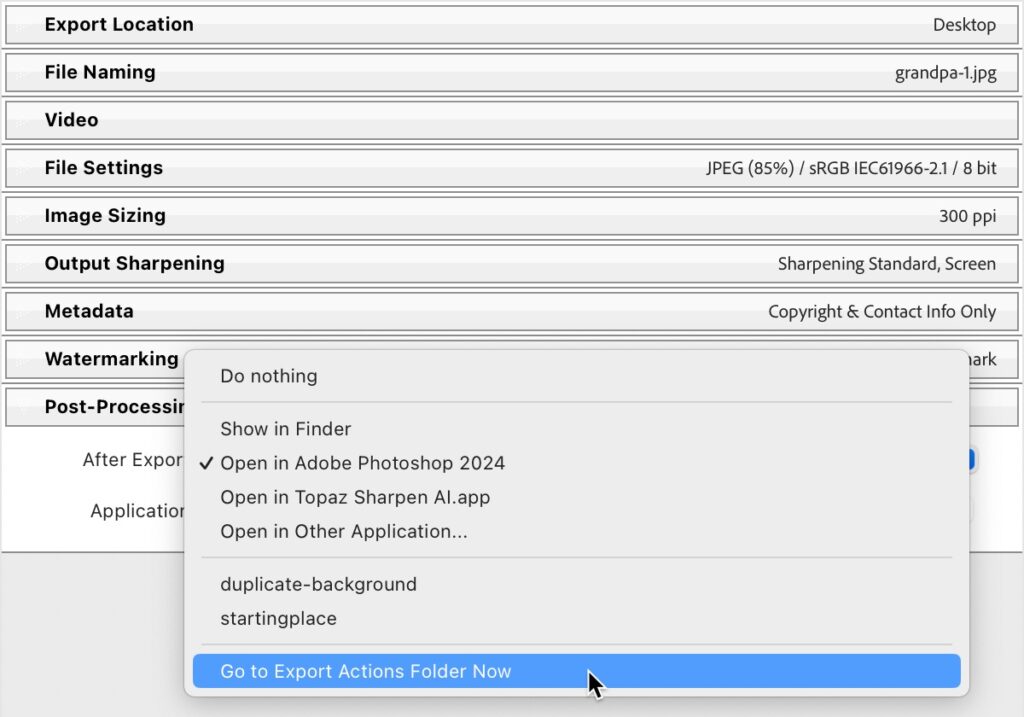
Step Three: Copy or move the droplet file from where you saved it when created to the Export Actions folder. Back in LrC, click Done to close the Export dialog without exporting.
That’s it. The next time you click the After Export drop-down menu you’ll see your droplet as an option below Open in Other Application. Just select it to have the exported copies run through the droplet. Note, if you get an error on Mac about the droplet being damaged when running the droplet, here’s the solution. I’d love to hear what kind of actions/droplets you use in this workflow.
The post Creating Droplets to Run on Export appeared first on Lightroom Killer Tips.
Continue reading...
- Duplicate the original background layer
- Rename the duplicated layer
- Hide the original layer
- Create a second view of the photo at 100% alongside another view of the photo that shows the entire image
This way I can start retouching the duplicated layer at 100% while simultaneously seeing how it affects the photo when zoomed out. Nothing life changing, just a few simple steps that can be done with the click of an action. This can be used the more traditional route of using the Edit in Photoshop command from LrC to send a copy to Photoshop. Once the photo opens in Ps, I’d simply run the action (press the Play button in the Action panel) and then start editing. To take it to the next level I’d create a droplet from that action. Here’s how:
Step One: In Photoshop, go to File > Automate > Create Droplet to open the Create Droplet dialog box.
Step Two: Click Choose to configure where you want your droplet to be saved (I have a designated folder in Dropbox for all actions and droplets) and give the droplet a name.
Step Three: In the Play section, choose the Action set containing your action, then in the Action section, select the action you want to be made into a droplet.
Step Four: Configure other options as needed based on what your action does (or doesn’t do). For this action, I don’t need to configure any other options, so I just clicked OK to create the droplet in the designated location.
Now that you have your droplet, you need to put it in a special folder in order for it to appear on the Export dialog in LrC. Here’s how:
Step One: Select any photo in LrC and click the Export button to open the Export dialog (we’re not going to export a copy of this photo, so anyone will do).
Step Two: On the Export dialog, in the Post-Processing panel, click the After Export drop-down menu and choose Go to Export Actions Folder Now to open this special folder in your system’s file browser (Finder/Explorer).
Step Three: Copy or move the droplet file from where you saved it when created to the Export Actions folder. Back in LrC, click Done to close the Export dialog without exporting.
That’s it. The next time you click the After Export drop-down menu you’ll see your droplet as an option below Open in Other Application. Just select it to have the exported copies run through the droplet. Note, if you get an error on Mac about the droplet being damaged when running the droplet, here’s the solution. I’d love to hear what kind of actions/droplets you use in this workflow.
The post Creating Droplets to Run on Export appeared first on Lightroom Killer Tips.
Continue reading...