RSSNewsFeeder
Member
One of the least fun editing tasks in Lightroom Classic is cleaning up sensor spots in the sky. Starting with a noisy and mottled sky makes it even worse. I wondered if it wouldn’t be easier to simply replace the sky completely instead of cleaning it up? I didn’t want a sky that was unrealistic or overly dramatic, just clean with a smooth gradient. So, I thought I’d give the new Select > Sky function a try. Here’s how it went.
Starting in LrC, here’s the photo, which is a merged pano that ended up being about 55 MegaPixels.

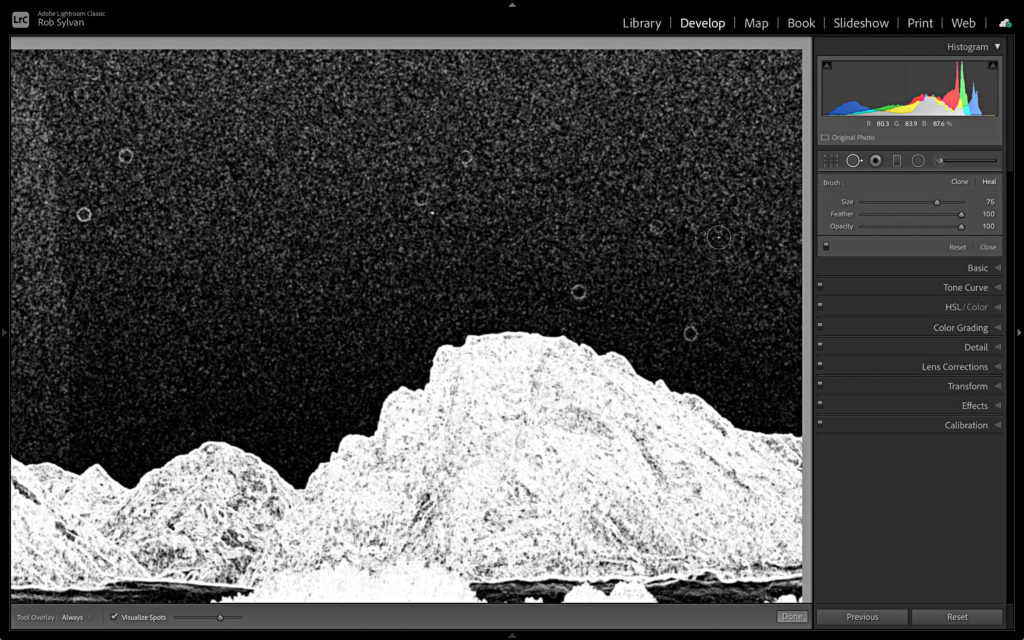
I love the colors and even the simple sky, but looking at it up close, it is a bit of a mess. Especially when I turn on the Visualize Spots function in the Spot Removal tool. Ugh. Yes, I obviously needed to clean the sensor.
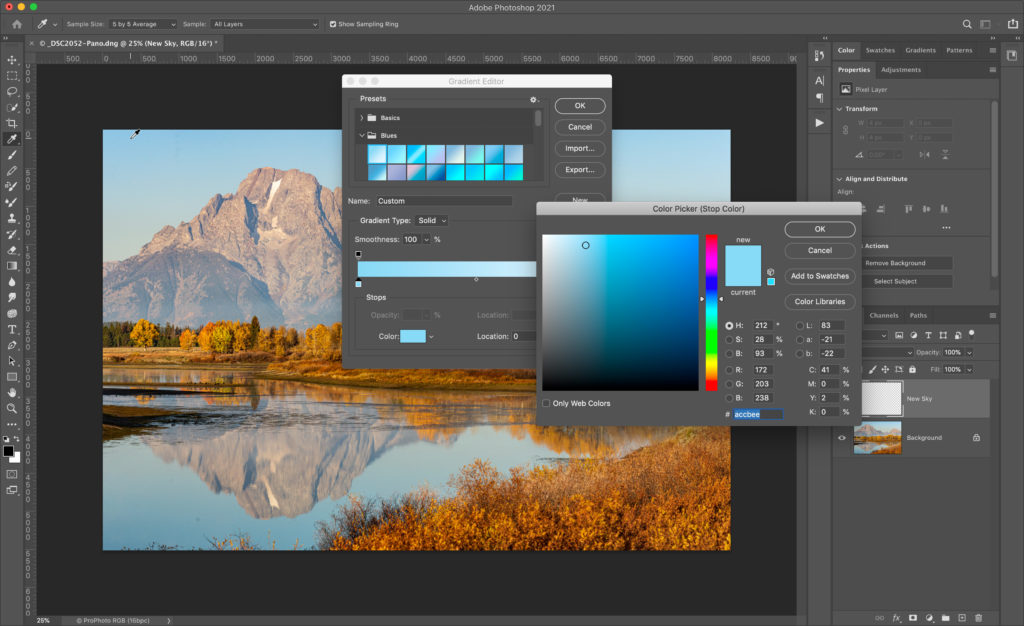
So, after completing my edits in LrC, minus Spot Removal, I sent a copy to Ps with LrC edits to see if I could rebuild the sky quickly and easily. The first thing I did was create a new empty layer above the Background layer. Then, grabbing the Gradient tool, I selected a blue gradient preset, and customized it by selecting colors from the sky in the photo. I wanted the new sky to look very similar to the original, just cleaner.
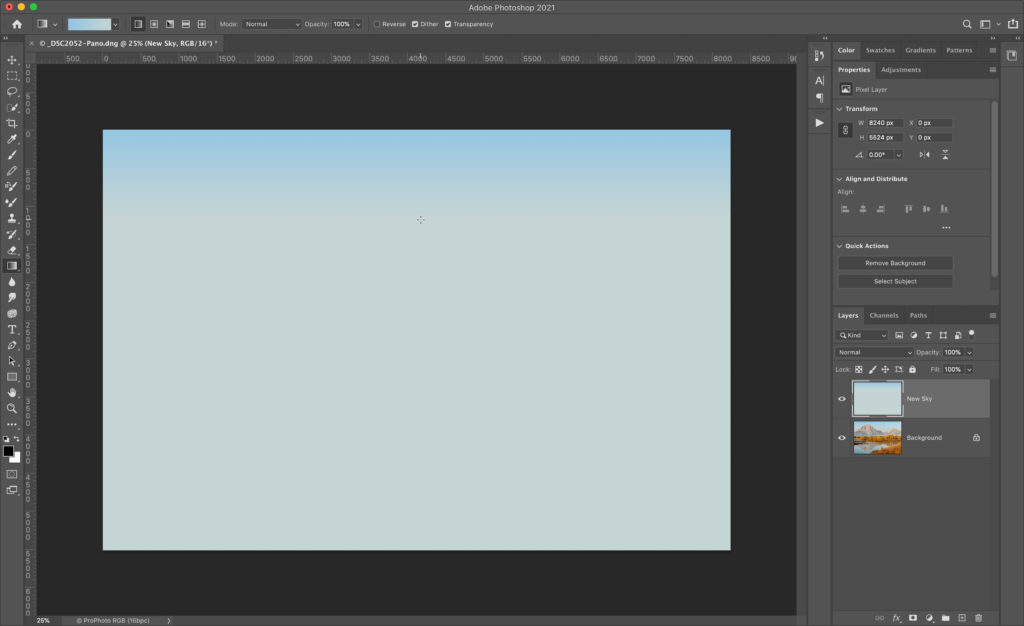
Then, on the new empty layer (that I named New Sky), I held the Shift key to constrain to vertical, and drew out my gradient.
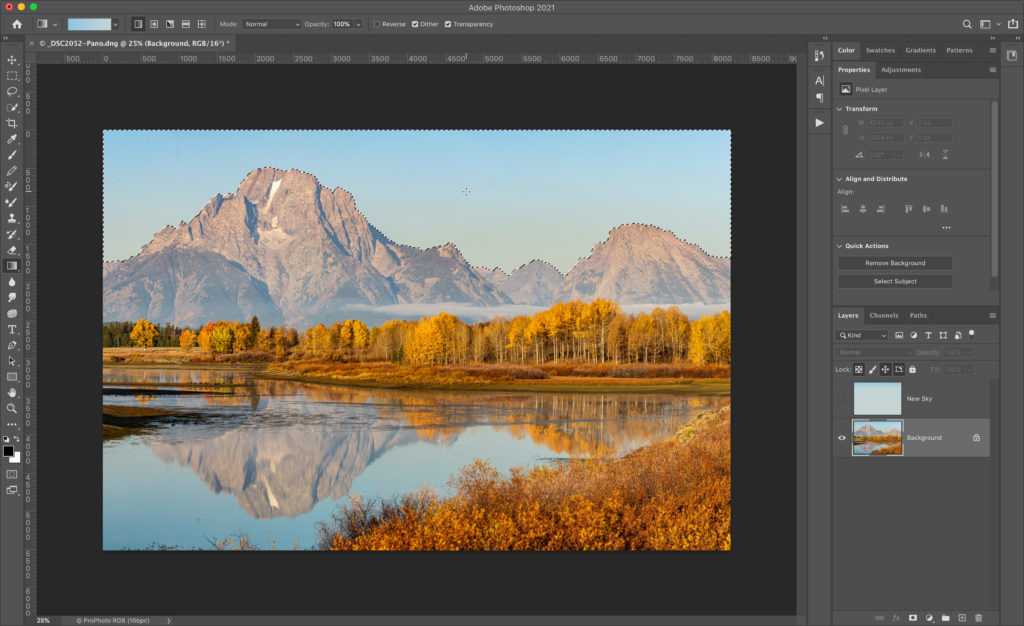
I can always re-draw that gradient, but that was good enough for a start. Next, I turned off visibility of the New Sky layer and selected the Background layer. Then, used the Select > Sky menu to have Photoshop work its magic and select the sky for me.
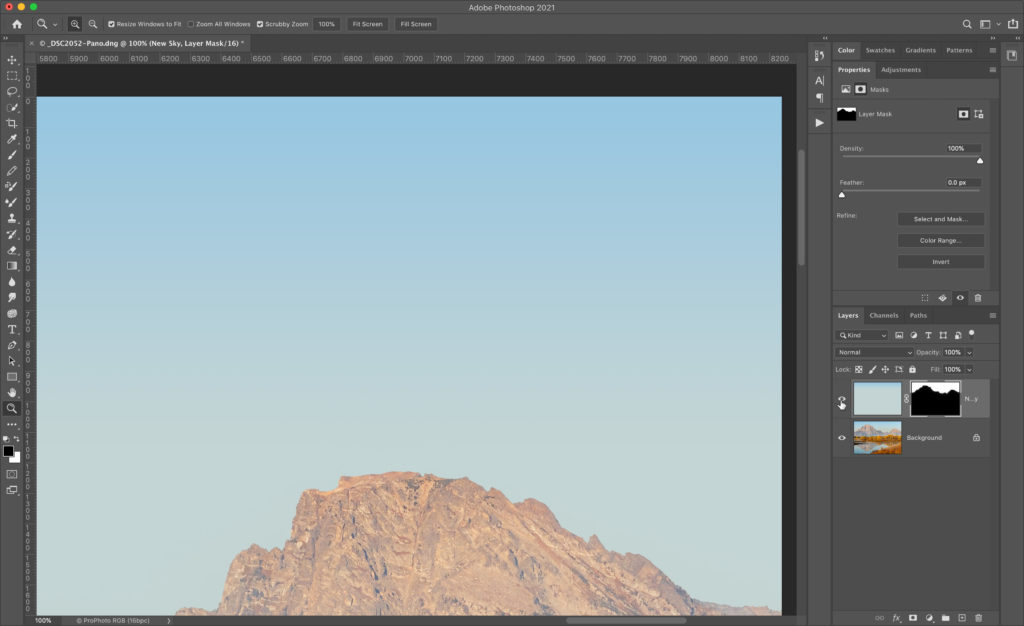
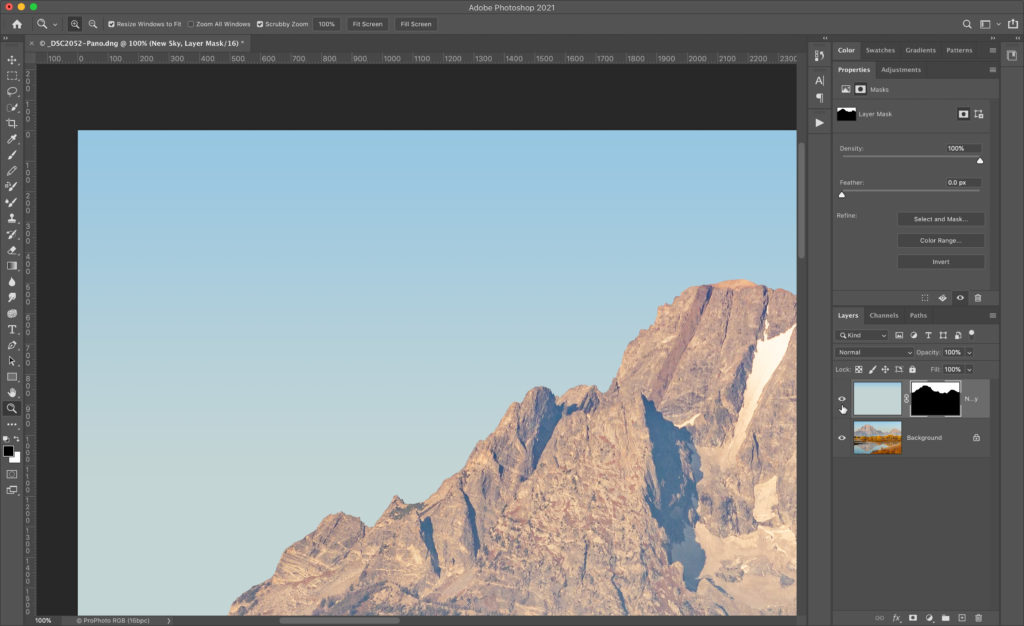
With my selection loaded, I made the New Sky layer visible again, selected it, and applied a Layer Mask to it. All my spots, noise, and mottled color were gone!
Next, I wanted to clean up the mask a little. The Select > Sky function does include some of the foreground as part of its function for blending in a new sky, but since my new sky wasn’t much different than the original in terms of color and tone, I didn’t need that aspect. So, with the mask selected, I clicked on Select and Mask in the Properties panel to refine the mask.
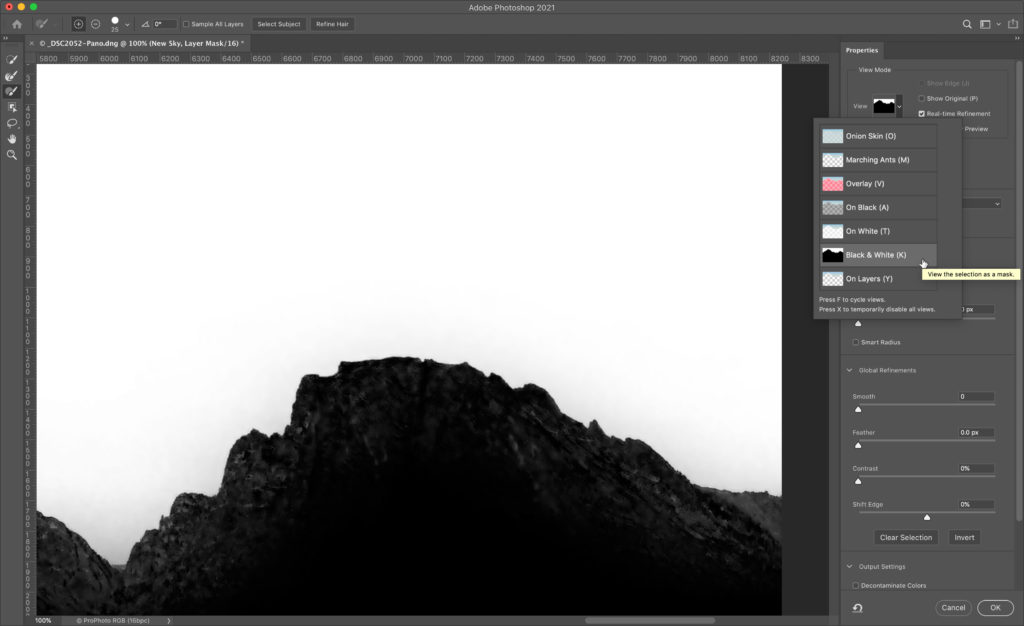
With the view in Select and Mask set to Black and White you can see the mask clearly.
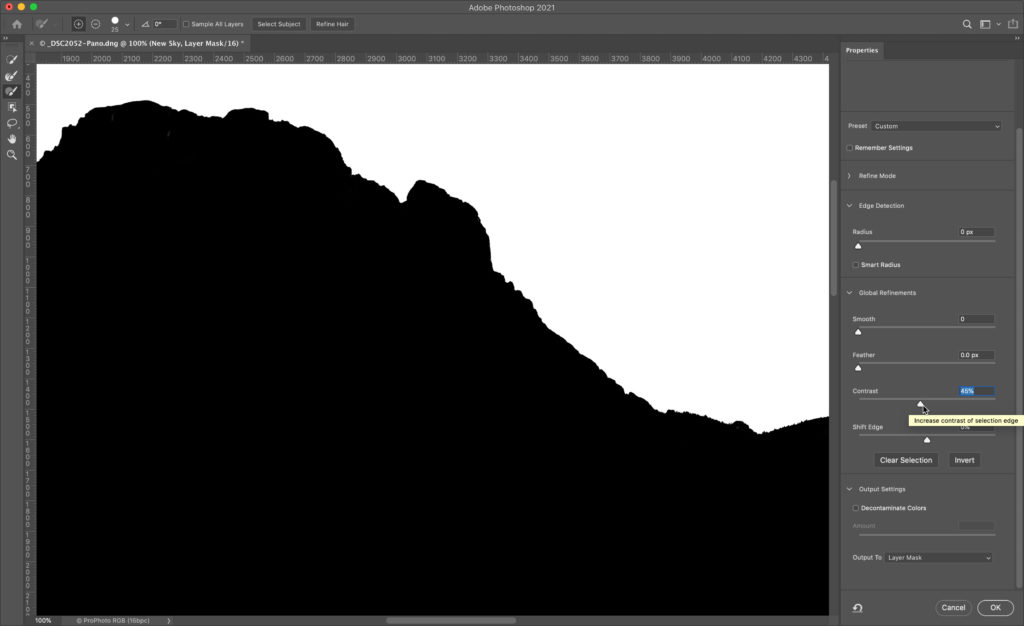
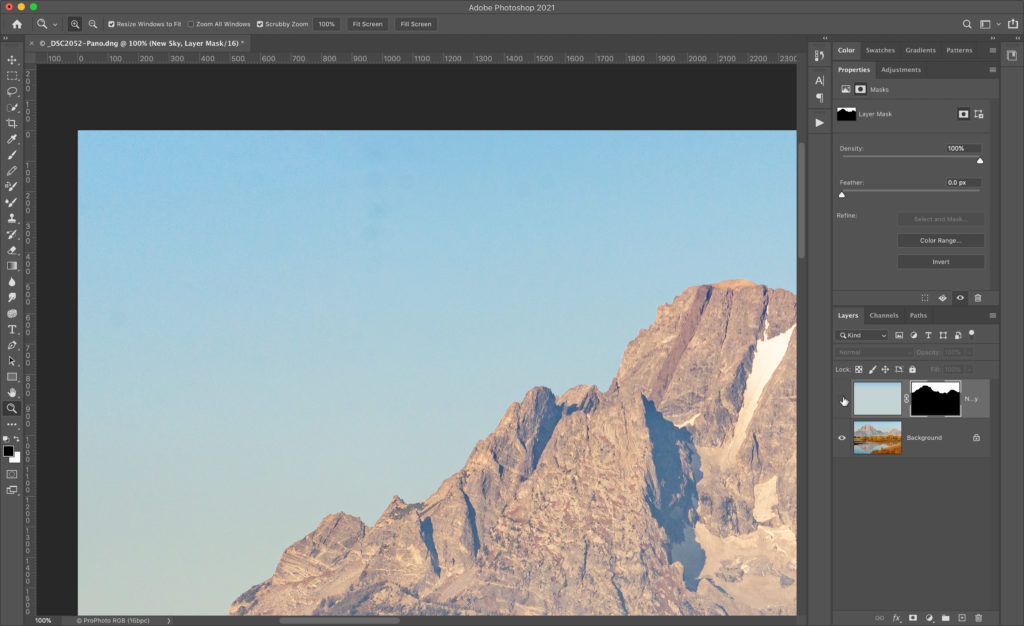
Increasing the Contrast slider forces the black areas blacker and white areas whiter, and cleaned that up nicely. With the output set to Layer Mask, I clicked OK, and I was done. Here’s the before and after just turning off the New Sky layer.
I will definitely keep that in mind for the next dirty sky, and will most likely will be using the Spot Removal brush in LrC a whole lot less (and yes, I did also clean the sensor). Hope you find that useful too!
The post Replacing the Sky Instead of Cleaning It appeared first on Lightroom Killer Tips.
Continue reading...
Starting in LrC, here’s the photo, which is a merged pano that ended up being about 55 MegaPixels.
I love the colors and even the simple sky, but looking at it up close, it is a bit of a mess. Especially when I turn on the Visualize Spots function in the Spot Removal tool. Ugh. Yes, I obviously needed to clean the sensor.
So, after completing my edits in LrC, minus Spot Removal, I sent a copy to Ps with LrC edits to see if I could rebuild the sky quickly and easily. The first thing I did was create a new empty layer above the Background layer. Then, grabbing the Gradient tool, I selected a blue gradient preset, and customized it by selecting colors from the sky in the photo. I wanted the new sky to look very similar to the original, just cleaner.
Then, on the new empty layer (that I named New Sky), I held the Shift key to constrain to vertical, and drew out my gradient.
I can always re-draw that gradient, but that was good enough for a start. Next, I turned off visibility of the New Sky layer and selected the Background layer. Then, used the Select > Sky menu to have Photoshop work its magic and select the sky for me.
With my selection loaded, I made the New Sky layer visible again, selected it, and applied a Layer Mask to it. All my spots, noise, and mottled color were gone!
Next, I wanted to clean up the mask a little. The Select > Sky function does include some of the foreground as part of its function for blending in a new sky, but since my new sky wasn’t much different than the original in terms of color and tone, I didn’t need that aspect. So, with the mask selected, I clicked on Select and Mask in the Properties panel to refine the mask.
With the view in Select and Mask set to Black and White you can see the mask clearly.
Increasing the Contrast slider forces the black areas blacker and white areas whiter, and cleaned that up nicely. With the output set to Layer Mask, I clicked OK, and I was done. Here’s the before and after just turning off the New Sky layer.
I will definitely keep that in mind for the next dirty sky, and will most likely will be using the Spot Removal brush in LrC a whole lot less (and yes, I did also clean the sensor). Hope you find that useful too!
The post Replacing the Sky Instead of Cleaning It appeared first on Lightroom Killer Tips.
Continue reading...